SCNG Technical Blog
SCNG Technical Blog
Windows Server 2022, WordPress

Installing WordPress on Windows: Part4

Installing WordPress on Windows: Part1

Installing WordPress on Windows: Part2

Installing WordPress on Windows: Part3


In the last part, we will install and configure WordPress (5.9.3). So we need to download wordpress-5.9.3.zip file.

We have to Unzip everything to the previously create WordPress folder (C:\inetpub\wordpress).


Now, we have to duplicate the wp-config-sample.php file in WordPress folder (C:\inetpub\wordpress) and rename it to the wp-config.php.

In the next step, we have to configure the wp-config.php. We have to change various parameters in the wp-config.php file:


22    /** The name of the database for WordPress */
23    define( ‘DB_NAME’, ‘wordpress’ );
24   
25    /** MySQL database username */
26    define( ‘DB_USER’, ‘wpadmin’ );
27   
28    /** MySQL database password */
29    define( ‘DB_PASSWORD’, ‘wpadmin_password’ );
30   
31    /** MySQL hostname */
32    define( ‘DB_HOST’, ‘127.0.0.1’ );


We are ready to finally start WordPress installation by opening browser and selecting install URL (https://test.domain.com/wp-admin/install.php).

You should get the screen below, where we can change the WordPress language and select Continue.


WordPress Install1


If you get an error, you can check what is going on with opening a PHP log file (PHP_errors.log) in your PHP-System folder (C:\PHP-System\logs).


In the next screen, we have to enter Site Title (WordPress Site), Username (admin), Password, Your Email (user@domain.com) and select Install WordPress button.


WordPress Install2


If everything is OK, we should get Success page.


WordPress Install3


Now, we can log in to the WordPress admin page with previously entered Username (admin) and Password.


WordPress wp-login


We should get the following WordPress Admin Page:


WordPress admin


Yes, we managed to do it! WordPress is installed and configured!!! We successfully finished our series of installing WordPress on Windows.

We can optimize WordPress, by removing unused Themes and by optimize. I would recommend installing PhastPress and WP Super Cache plugins. These plugins will improve performance of your WordPress site.


In the future, we can easily update WordPress core and Plugins.


Enjoy posting on your WordPress Site!


27. January 2022by Simon Abolnar
Windows Server 2022, WordPress

Installing WordPress on Windows: Part3

Installing WordPress on Windows: Part1

Installing WordPress on Windows: Part2

Installing WordPress on Windows: Part4


In the third part, we will install and configure IIS, that use PHP as FastCGI.


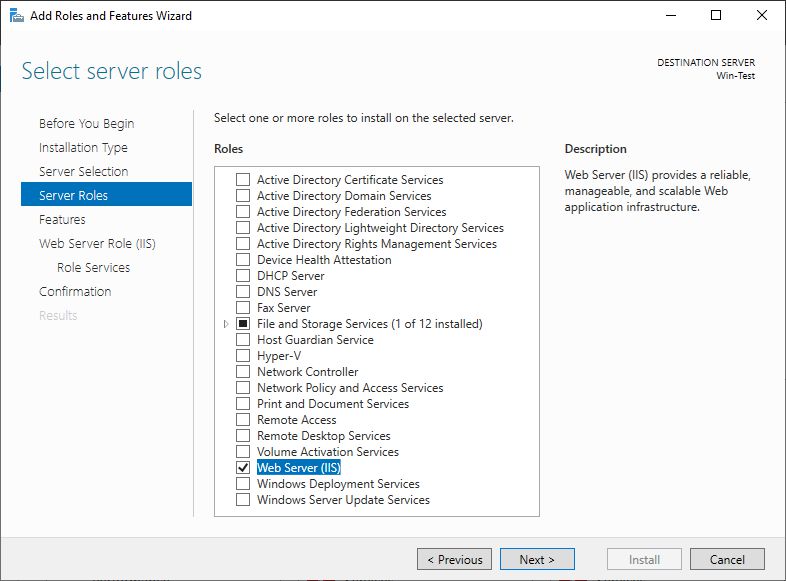
Firstly, we need to install IIS by using Server Manager. We choose Add roles and features, Next, Role-based or feature-based installation, Next, select our server from Server Pool, Next and select Web Server (IIS) role that we want to install. We also select [Tools] IIS Management Console feature installation (Add Features).


IIS Role WordPress


We continue with Next, Next, Next. Now we have to choose, which Role Services we would like to install. We have to add CGI under Application Development.


IIS Rele Services WordPress


After that, we continue installation by selecting Next and Install.


We have to install also the URL Rewrite 2.1 extension, that we will use in our configuration. We have to download it from Official Microsoft site, www.iis.net. Installation is very easy. Unfortunately, the setup will also install the Web Platform Installer 5.1, that will install the required extension. We can uninstall it, after the install procedure is over.


Now, we are ready to configure the IIS.

For configuration we will use Internet Information Services (IIS) Manager. In the first step, we will create a new Website, that will be used by WordPress. We have to create a folder (C:\inetpub\wordpress), which will be used for WordPress files and folders location.

So we select Sites under Connections window and choose Add Website… We enter new Site Name (WordPress) with Application pool (WordPress) and define the Physical path, which was created before (C:\inetpub\wordpress).


WordPress Add Website


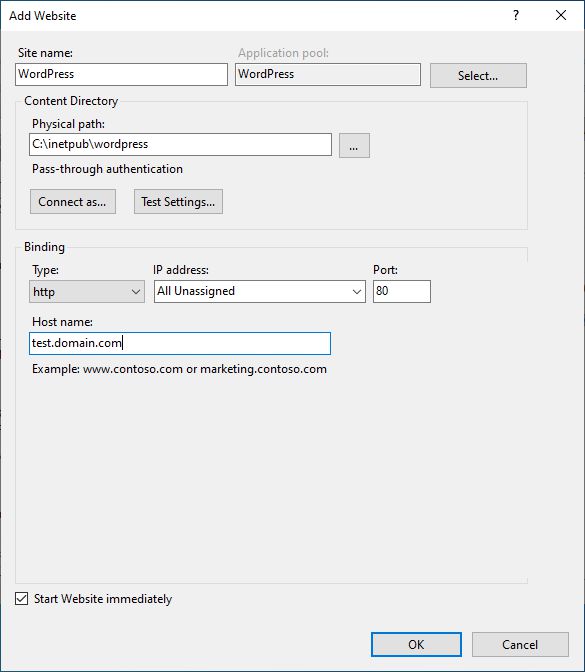
We have to select appropriate Binding. Port 80 is already used by Default Web Site, which was created during IIS installation. So, we have to enter the Host name, that will be used for accessing our WordPress site (test.domain.com). You write your own FQDN of your server name.


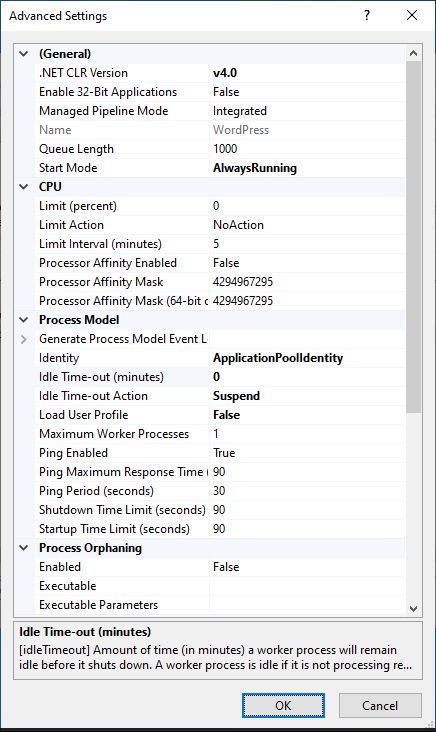
In IIS Manager, we select created Application Pool (WordPress) and change Advanced Settings:

Start Mode: Always Running

Idle Time-out (minutes): 0

Idle Time-out Action: Suspend


WordPress AppPool Settings


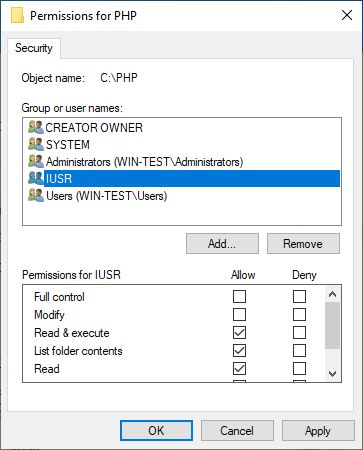
After that, we have to add permission on C:\PHP folder for the user IUSR with Read & Execute, List folder contents and Read permissions. This applies to this folder, subfolders and files.


WordPress PHP Permissions


We have to add permission on C:\PHP-System folder for the user IUSR with Read & Execute, List folder contents and Read permissions. This applies to this folder, subfolders and files.

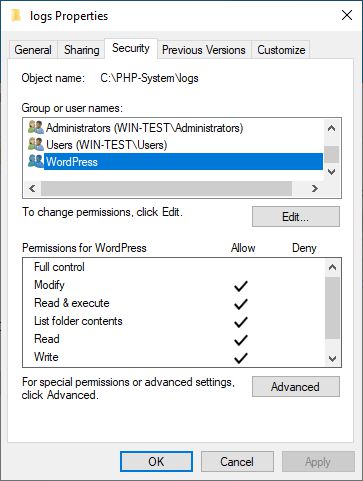
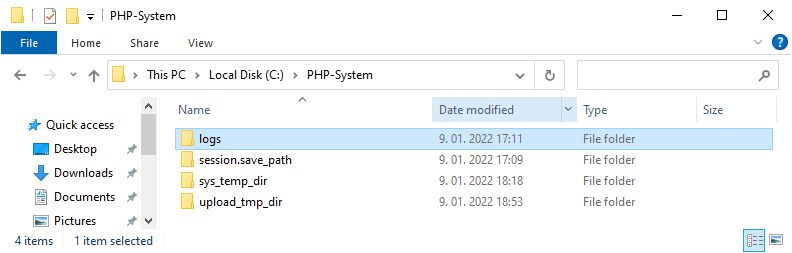
We have to add permission on C:\PHP-System\logs, C:\PHP-System\session.save_path, C:\PHP-System\sys_temp_dir and C:\PHP-System\upload_tmp_dir folders for  the user IIS AppPool\WordPress with Modify, Read & Execute, List folder contents, Read and Write permissions. This applies to this folder, subfolders and files.


WordPress PHP System Permissions


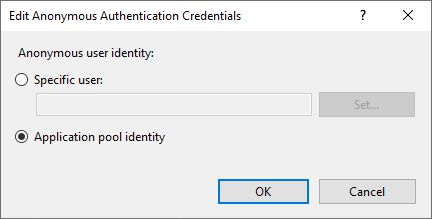
We have to change Anonymous Authentication Credentials to Application pool Identity by selecting WordPress Site in IIS Manager, and edit Anonymous Authentication.


WordPress Anonymous Authentication


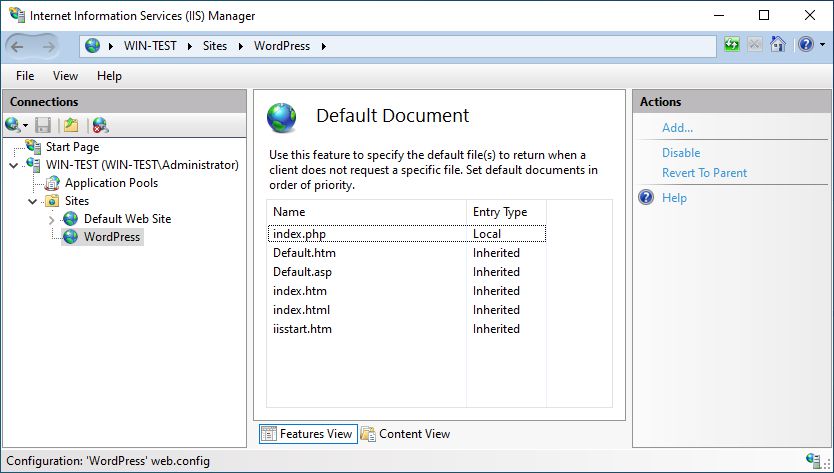
By selecting Default Document, we have to add index.php name.


WordPress Default Document


In the next step, we have to select our computer name under Connections window.


WordPress IIS Manager1


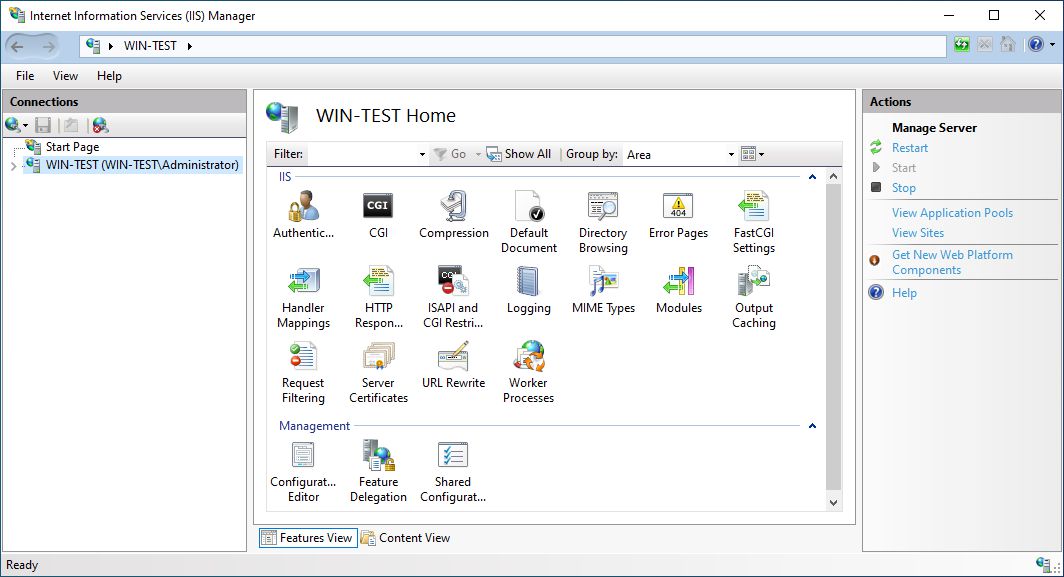
We need to select FastCGI Settings and Add Application… We need to select php.exe location (in our case C:\PHP\php-cgi.exe) and we change FastCGI Properties:

Instance MaxRequests: 10000

Max Instances: 0


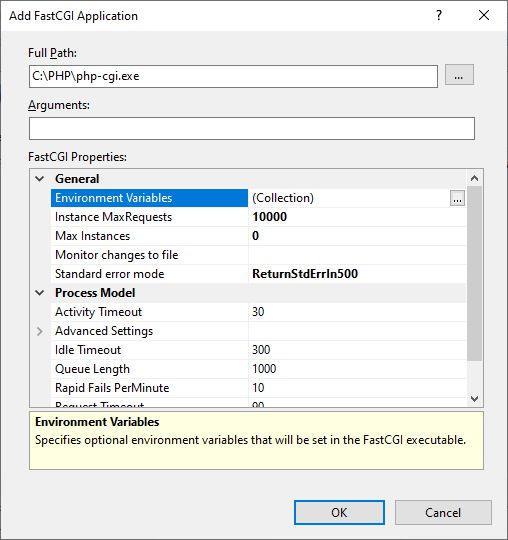
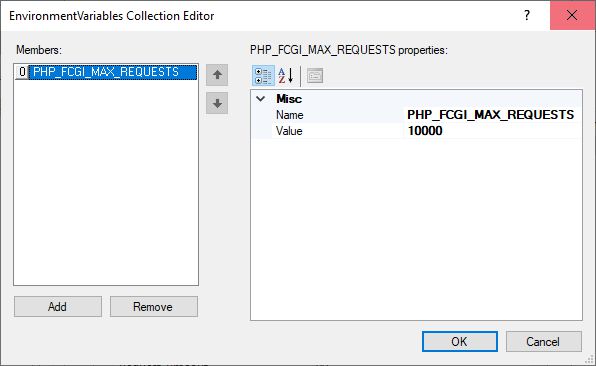
We click on the three dots next to Environment Variables (Collection). Then we add the variable with the name PHP_FCGI_MAX_REQUESTS and value 10000.


WordPress FastCGI Variable


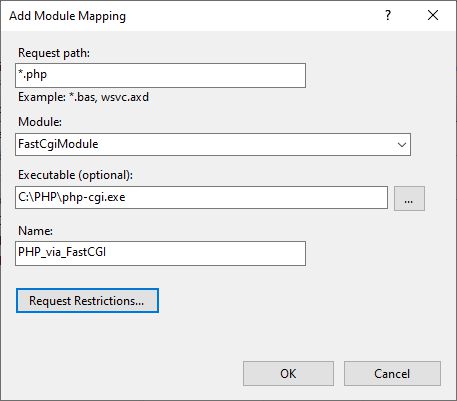
We return to the first IIS screen and select Handler Mappings. We select Add Module Mapping… and enter data:

Request path: *.php

Module: FastCGIModule

Executable (optional): C:\PHP\php-cgi.exe

Name: PHP_via_FastCGI


WordPress Module Mapping


We have to confirm it by clicking Yes.


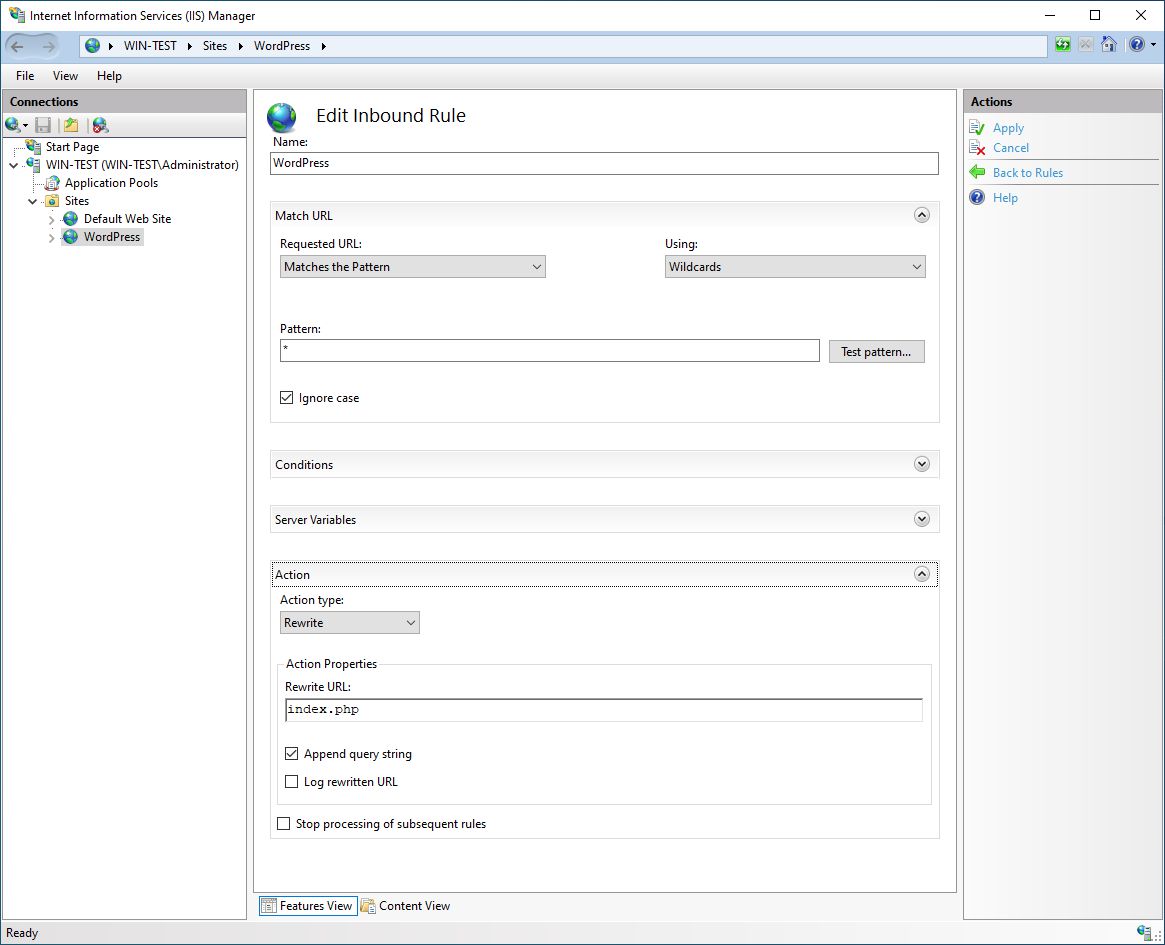
Now we need to open our WordPress Site in IIS Manager again and select URL Rewrite. Then we Add Rule… and select Blank rule. We have to edit Inbound Rule. We have to add Name (WordPress), change Using (Wildcards), add Pattern (*). Under Conditions, we add two conditions:

Conditions Input: {REQUEST_FILENAME}, Check if input string: Is Not a File

Conditions Input: {REQUEST_FILENAME}, Check if input string: Is Not a Directory


WordPress URL Rewrite 1


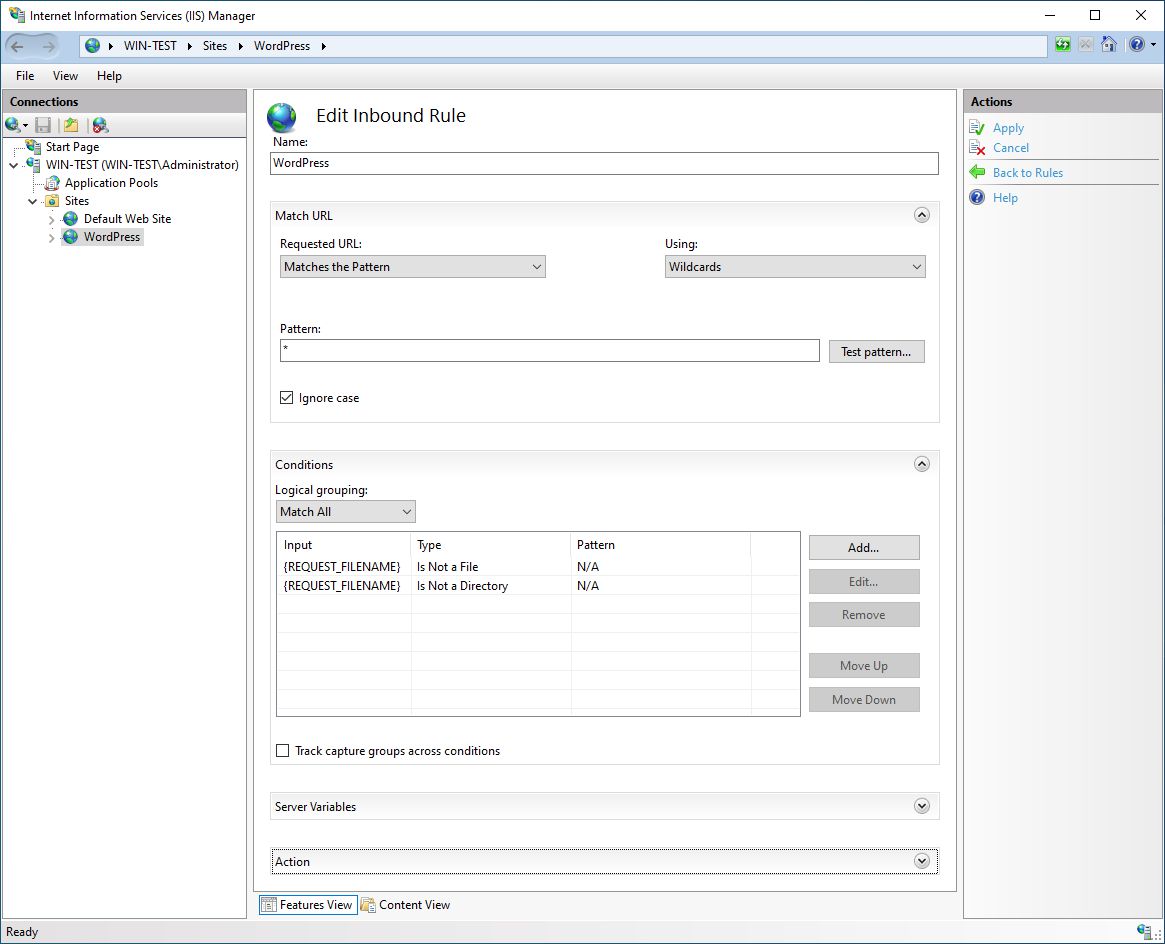
Under Action and Rewrite URL, we add index.php.


WordPress URL Rewrite 2


We would like to have a secure TLS (https) connection to access our Web Site, so we will need computer certificate for this. You can buy it or get it free by using Let’s Encrypt (one free option).

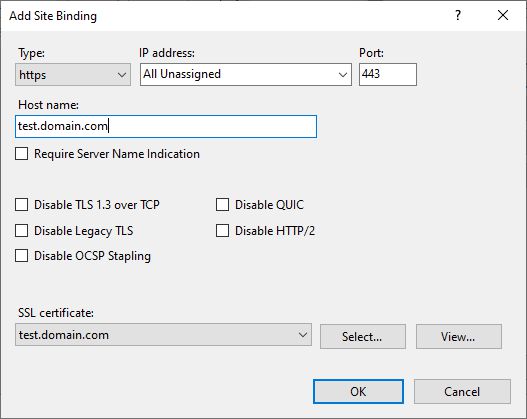
We have to add TLS (https) binding for WordPress Site. We select WordPress Site in IIS Manager and select Bindings… and then Add… button. In the Add Site Binding window, we select https type, Host name (test.domain.com) and finally select our SSL certificate.


WordPress Add https


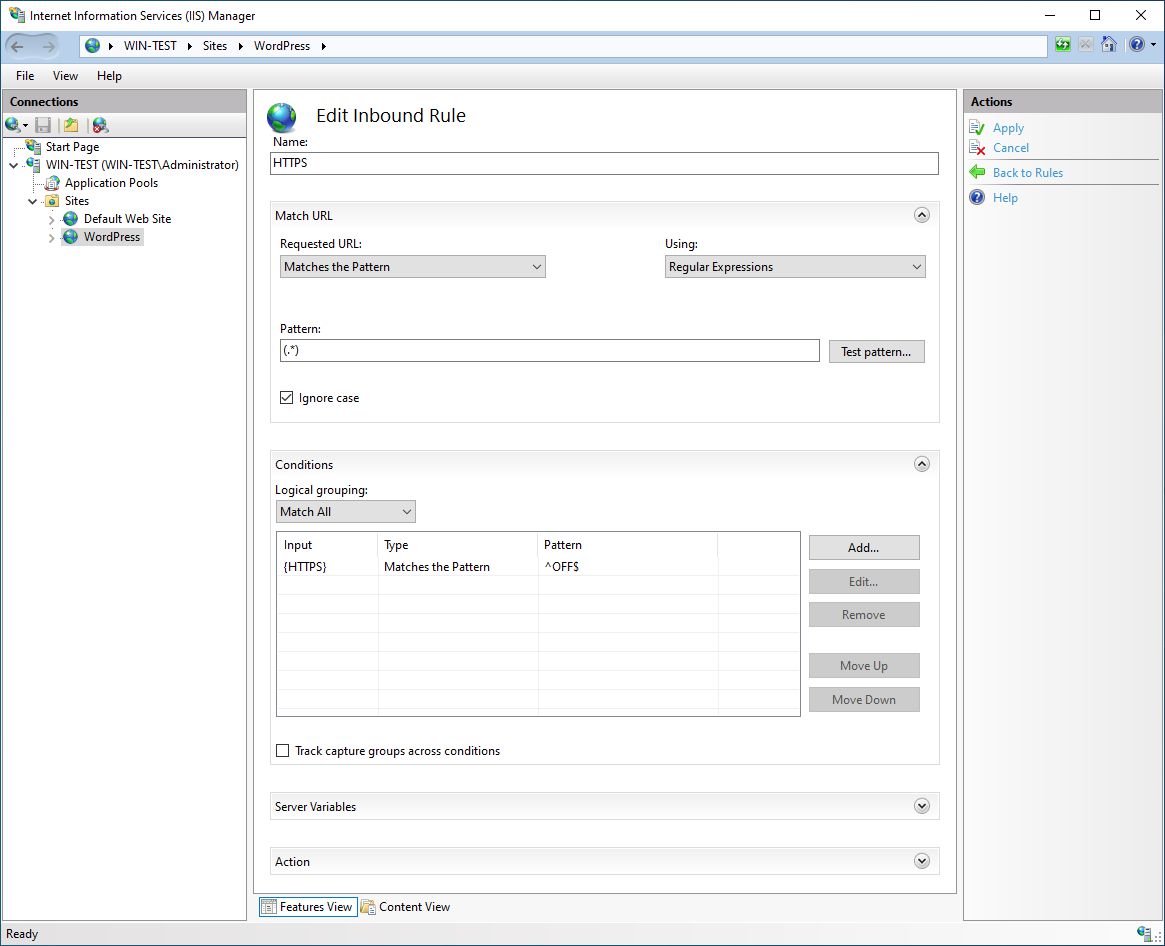
We want that all http requests to our site will be automatically redirected to https. For this purpose, we will create another URL Rewrite rule. So we select URL Rewrite, then we Add Rule… and select Blank rule. We have to edit Inbound Rule. We have to add Name (HTTPS), add Pattern (.*). Under Conditions, we add a condition:

Conditions Input: {HTTPS}, Check if input string: Matches the Pattern, Pattern: ^OFF$


WordPress URL Rewrite 3


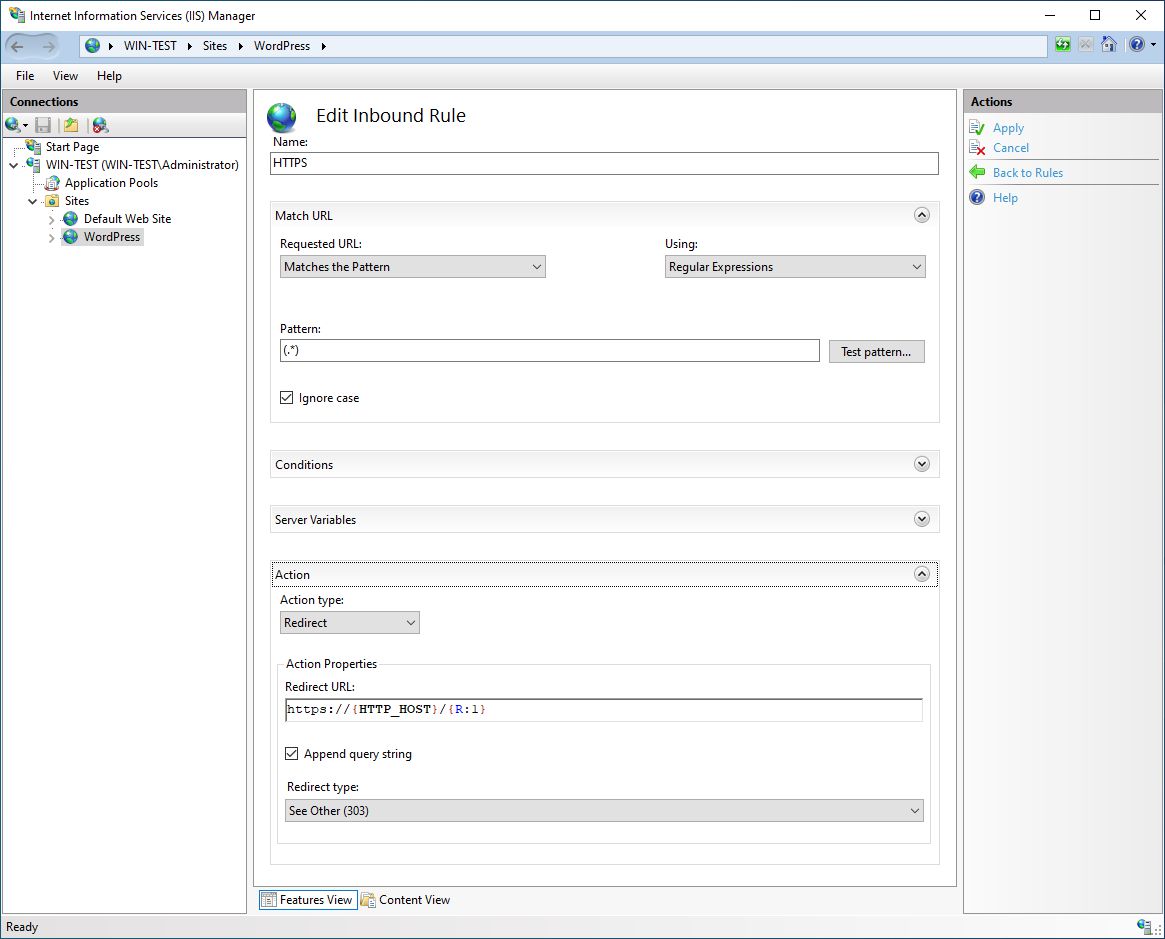
Under Action, we select Redirect Action type with Redirect URL: https://{HTTP_HOST}/{R:1} and Redirect type: See Other (303).


WordPress URL Rewrite 4


Finally, we have to make a test, that IIS and PHP work fine together. For this we create a small phpinfo.php file in our WordPress folder (C:\inetpub\wordpress):

WordPress phpinfo


Now we need to open a browser and select WordPress site URL (http://test.domain.com/phpinfo.php). If everything works OK, site should be redirected to https and open a PHP info page.


WordPress phpinfo Browser


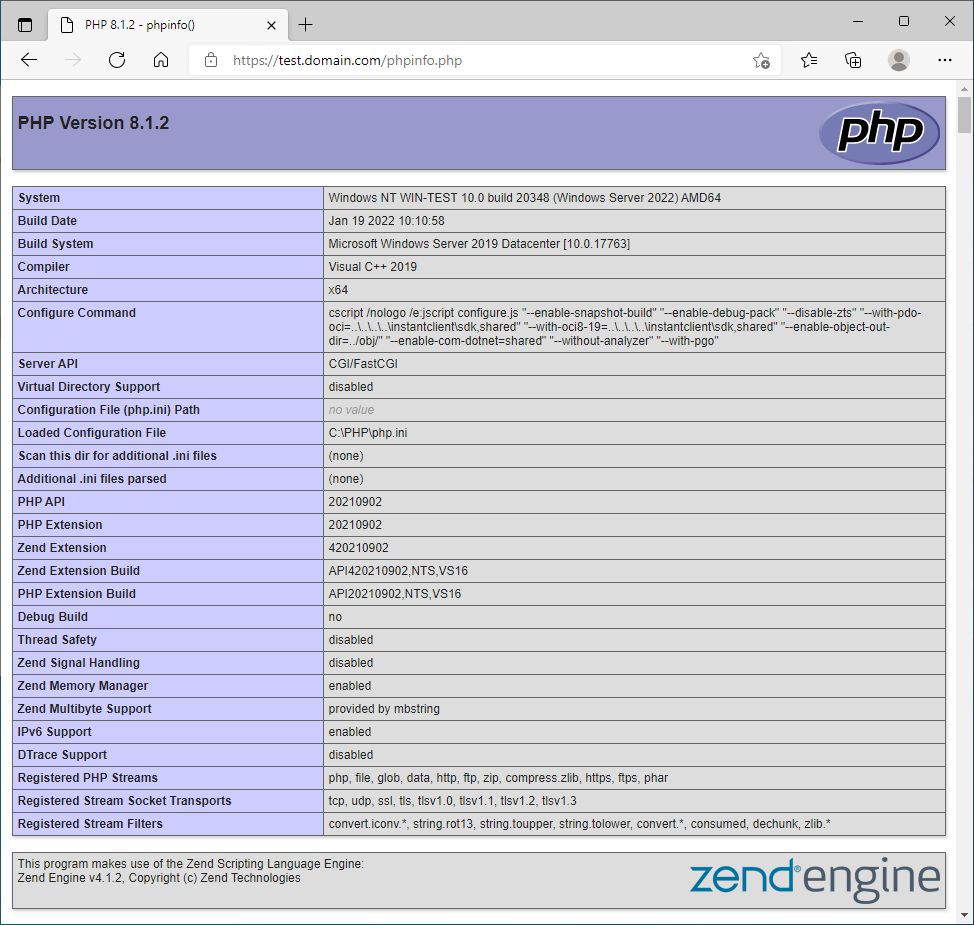
We see, that IIS, that use PHP as FastCGI is successfully configured.


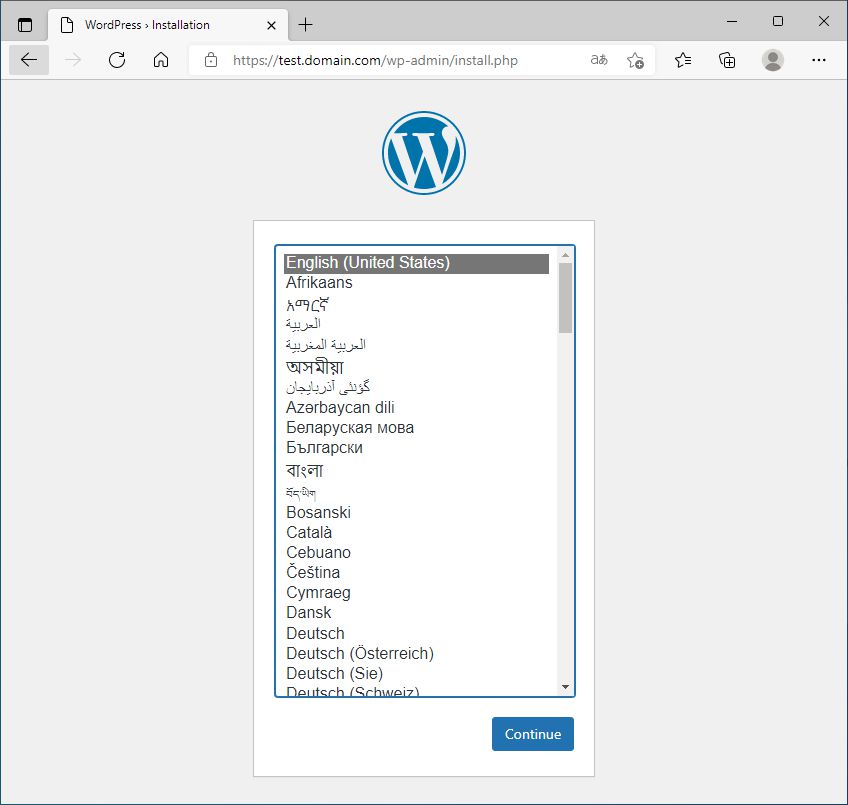
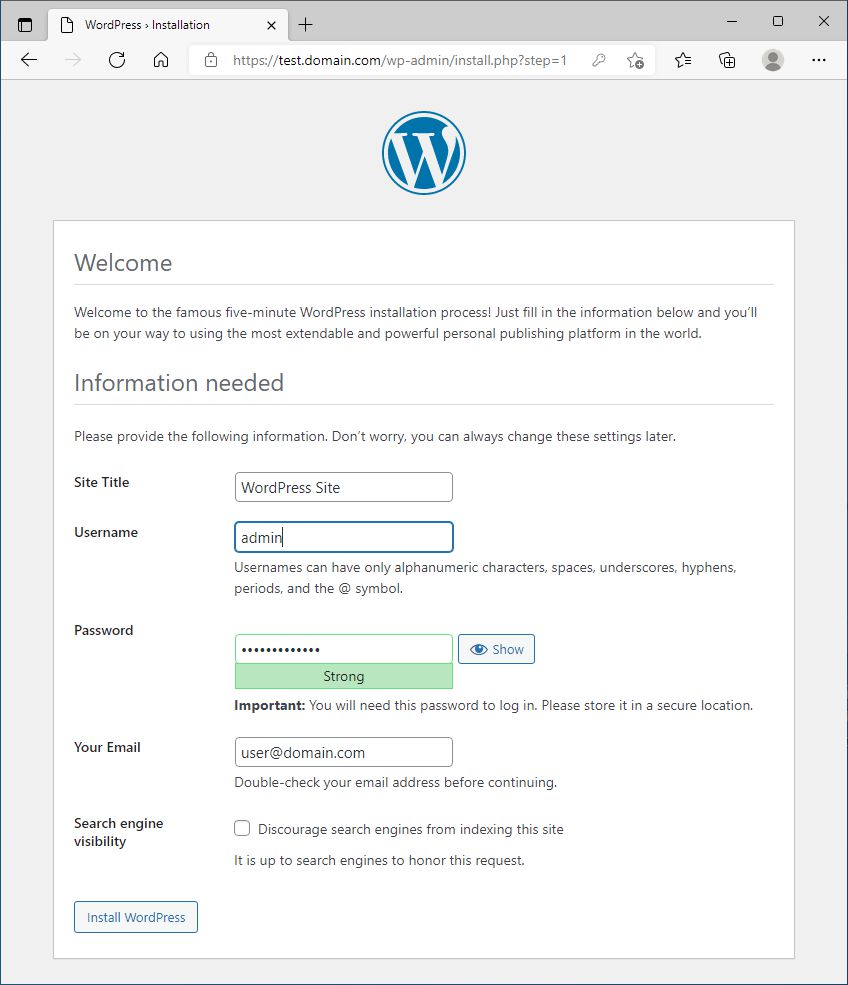
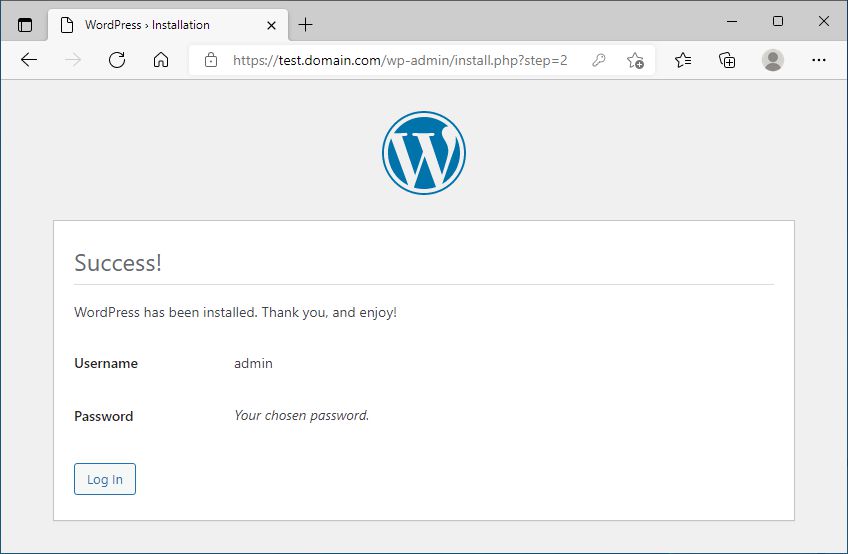
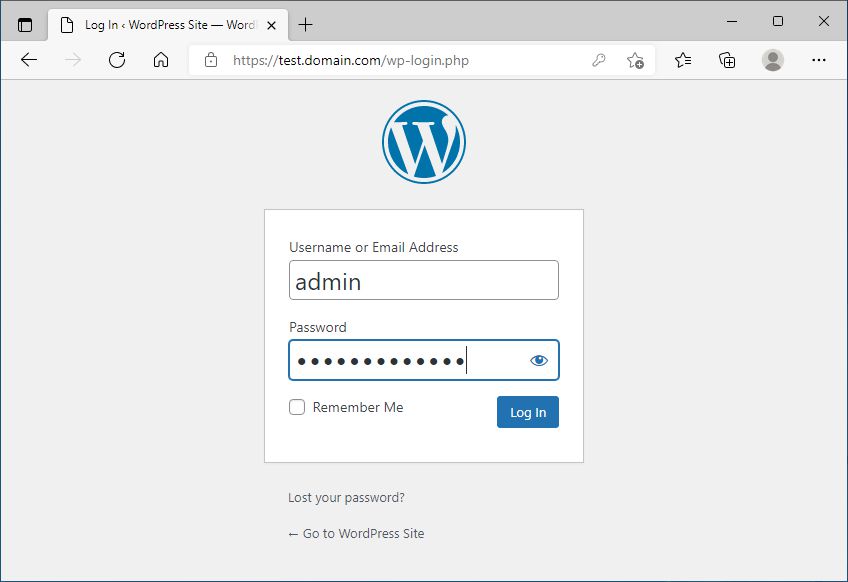
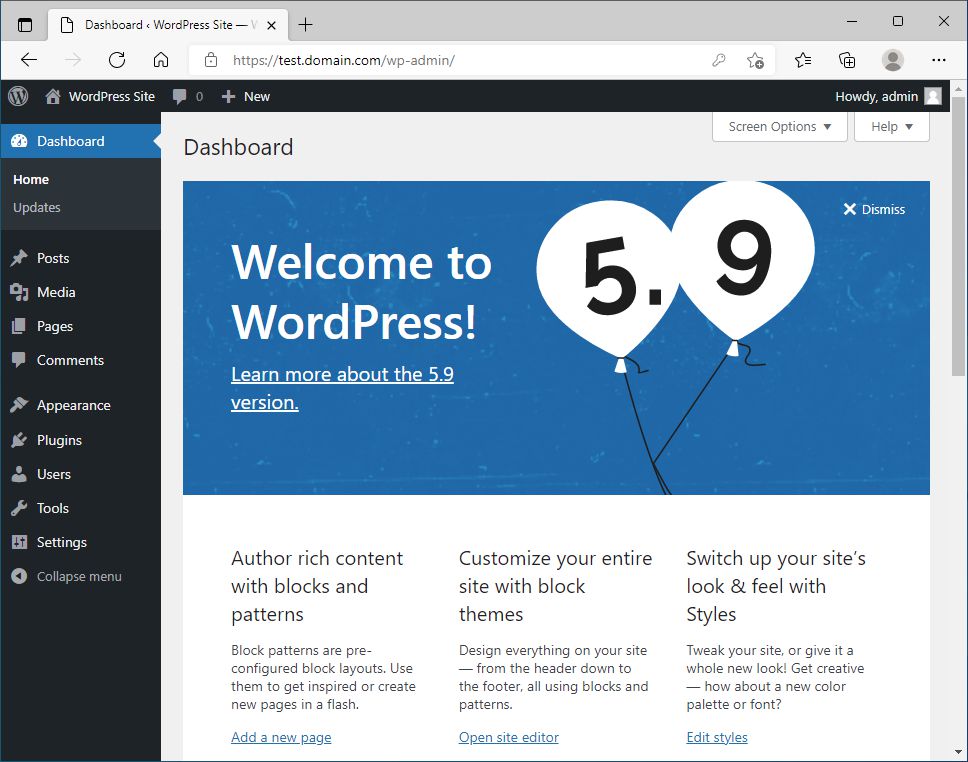
Now, we are finally ready to install and configure WordPress.


27. January 2022by Simon Abolnar
Windows Server 2022, WordPress

Installing WordPress on Windows: Part2

Installing WordPress on Windows: Part1

Installing WordPress on Windows: Part3

Installing WordPress on Windows: Part4


In the second part, we will cover PHP installation and configuration.


Some users want to install PHP by using Microsoft Web Platform Installer. I would not recommend it anymore, because we don’t have a choice to install the latest version of PHP. It is better to manual install it. We can download PHP from the site PHP For Windows: Binaries and sources Releases.


In general we have three options:

PHP 7.4.29 (the latest 7.4 build),

PHP 8.0.18 (the latest 8.0 build) and

PHP 8.1.5 (the latest 8.1 build).

After testing all three options, I would recommend using PHP 8.1.5 with the latest WordPress version 5.9.3. We get the fastest response and we don’t get internal server errors 500. Some plugins may not be compatible with PHP 8.1.5, but we can solve the plugins problems by using workarounds.

Be aware, that PHP 8.1.5 has not been officially supported yet.

If you will use PHP 8.0.18, be prepare to get internal server error 500 randomly from time to time.

With PHP 7.4.29, your WordPress Site will be much slower.


For using PHP as FastCGI with IIS, we should use the Non-Thread Safe (NTS) versions of PHP. So we need to download PHP 8.1.5 VS16 x64 Non Thread Safe zip file.

We have to Unzip everything to the selected PHP folder. I choose the C:\PHP folder.

We create another folder, C:\PHP-System, which will be used for temporary and log files. Inside the C:\PHP-System folder, we create 4 folders:

logs

session.save_path

sys_temp_dir

upload_tmp_dir

Inside logs folder, we create an empty PHP_errors.log file.


PHP-System Folder


We also create the folder, C:\PHP-Imagick, which will be used for Imagick extension, that is needed for WordPress. We can download php_imagick-3.7.0-8.1-nts-vs16-x64.zip file. We have to Unzip everything to the C:\PHP-Imagick folder. Then copy the php_imagick.dll file in the C:\PHP\ext folder.


For future upgrades of PHP, we will only replace files in the C:\PHP, C:\PHP-Imagick folders and the php_imagick.dll file in the C:\PHP\ext folder.


Now, we have to duplicate the php.ini-production file in C:\PHP folder and rename it to the php.ini.

In the next step, we have to configure the php.ini for WordPress use. We have to change various parameters in the php.ini file:


586    ; Log errors to specified file. PHP’s default behavior is to leave this value
587    ; empty.
588    ; https://php.net/error-log
589    ; Example:
590    ;error_log = php_errors.log
591    ; Log errors to syslog (Event Log on Windows).
592    error_log = “C:\PHP-System\logs\PHP_errors.log”


694    ; Maximum size of POST data that PHP will accept.
695    ; Its value may be 0 to disable the limit. It is ignored if POST data reading
696    ; is disabled through enable_post_data_reading.
697    ; https://php.net/post-max-size
698    post_max_size = 32M


767    ; Directory where the temporary files should be placed.
768    ; Defaults to the system default (see sys_get_temp_dir)
769    sys_temp_dir = “C:\PHP-System\sys_temp_dir”


777    ; cgi.force_redirect is necessary to provide security running PHP as a CGI under
778    ; most web servers. Left undefined, PHP turns this on by default. You can
779    ; turn it off here AT YOUR OWN RISK
780    ; **You CAN safely turn this off for IIS, in fact, you MUST.**
781    ; https://php.net/cgi.force-redirect
782    cgi.force_redirect = 0


795    ; cgi.fix_pathinfo provides *real* PATH_INFO/PATH_TRANSLATED support for CGI. PHP’s
796    ; previous behaviour was to set PATH_TRANSLATED to SCRIPT_FILENAME, and to not grok
797    ; what PATH_INFO is. For more information on PATH_INFO, see the cgi specs. Setting
798    ; this to 1 will cause PHP CGI to fix its paths to conform to the spec. A setting
799    ; of zero causes PHP to behave as before. Default is 1. You should fix your scripts
800    ; to use SCRIPT_FILENAME rather than PATH_TRANSLATED.
801    ; https://php.net/cgi.fix-pathinfo
802    cgi.fix_pathinfo=1


808    ; FastCGI under IIS supports the ability to impersonate
809    ; security tokens of the calling client. This allows IIS to define the
810    ; security context that the request runs under. mod_fastcgi under Apache
811    ; does not currently support this feature (03/17/2002)
812    ; Set to 1 if running under IIS. Default is zero.
813    ; https://php.net/fastcgi.impersonate
814    fastcgi.impersonate = 1
815   
816    ; Disable logging through FastCGI connection. PHP’s default behavior is to enable
817    ; this feature.
818    fastcgi.logging = 1


843    ; Temporary directory for HTTP uploaded files (will use system default if not
844    ; specified).
845    ; https://php.net/upload-tmp-dir
846    upload_tmp_dir = “C:\PHP-System\upload_tmp_dir”
847   
848    ; Maximum allowed size for uploaded files.
849    ; https://php.net/upload-tmp-dir
850    upload_max_filesize = 10M


917    ;extension=bz2
918    extension=curl
919    ;extension=ffi
920    ;extension=ftp
921    extension=fileinfo
922    extension=gd
923    ;extension=gettext
924    ;extension=gmp
925    extension=intl
926    ;extension=imap
927    ;extension=ldap
928    extension=mbstring
929    extension=exif      ; Must be after mbstring as it depends on it
930    extension=mysqli
931    ;extension=oci8_12c  ; Use with Oracle Database 12c Instant Client
932    ;extension=oci8_19  ; Use with Oracle Database 19 Instant Client
933    ;extension=odbc
934    extension=openssl
935    ;extension=pdo_firebird
936    ;extension=pdo_mysql
937    ;extension=pdo_oci
938    ;extension=pdo_odbc
939    ;extension=pdo_pgsql
940    ;extension=pdo_sqlite
941    ;extension=pgsql
942    ;extension=shmop
943    extension=php_imagick.dll


1352   ; where MODE is the octal representation of the mode. Note that this
1353   ; does not overwrite the process’s umask.
1354   ; https://php.net/session.save-path
1355   session.save_path = “C:\PHP-System\session.save_path”


1766   ; Determines if Zend OPCache is enabled
1767   opcache.enable=1
1768  
1769   ; Determines if Zend OPCache is enabled for the CLI version of PHP
1770   opcache.enable_cli=0
1771  
1772   ; The OPcache shared memory storage size.
1773   opcache.memory_consumption=2048
1774  
1775   ; The amount of memory for interned strings in Mbytes.
1776   opcache.interned_strings_buffer=64
1777  
1778   ; The maximum number of keys (scripts) in the OPcache hash table.
1779   ; Only numbers between 200 and 1000000 are allowed.
1780   opcache.max_accelerated_files=50000
1781  
1782   ; The maximum percentage of “wasted” memory until a restart is scheduled.
1783   opcache.max_wasted_percentage=15


1791   ; When disabled, you must reset the OPcache manually or restart the
1792   ; webserver for changes to the filesystem to take effect.
1793   opcache.validate_timestamps=0
1794  
1795   ; How often (in seconds) to check file timestamps for changes to the shared
1796   ; memory storage allocation. (“1” means validate once per second, but only
1797   ; once per request. “0” means always validate)
1798   opcache.revalidate_freq=0


1803   ; If disabled, all PHPDoc comments are dropped from the code to reduce the
1804   ; size of the optimized code.
1805   opcache.save_comments=1


1861   ; Mapping base of shared memory segments (for Windows only). All the PHP
1862   ; processes have to map shared memory into the same address space. This
1863   ; directive allows to manually fix the “Unable to reattach to base address”
1864   ; errors.
1865   opcache.mmap_base=0x20000000


We have installed and configured PHP for WordPress. It is done the second step with our installing WordPress on Windows series.


Next, we have to install and configure IIS that use PHP as FastCGI.


27. January 2022by Simon Abolnar
Page 1 of 3123»

About us

We are employed at School Center Nova Gorica (SCNG), which is located in Slovenia-EU and we are enthusiastic about new technologies, especially in Microsoft Technologies. We would like to share our knowledge, thoughts and solutions in different areas of Information Technologies.

Authors:

  • Simon Abolnar
  • Klavdij Mervic
  • Barbara Pusnar

Categories

  • Exchange Server
  • Hyper-V
  • Office 2021
  • SCCM
  • SharePoint
  • Windows 11
  • Windows Server 2022
  • WordPress

Links

  • Solski center Nova Gorica
  • Luka Manojlovic - Blog

Recent Posts

  • Installing WordPress on Windows: Part4 27. January 2022
  • Installing WordPress on Windows: Part3 27. January 2022
  • Installing WordPress on Windows: Part2 27. January 2022

Recent Comments

  • Skye on Event 10016
    {03E09F3B-DCE4-44FE-A9CF-82D050827E1C} Warning
  • Simon Abolnar on Installing WordPress on Windows: Part4
  • Sandi on Installing WordPress on Windows: Part4

Archives

  • January 2022
  • December 2021
  • September 2016
  • August 2016

Tags

Exchange Server Hyper-V Office 2021 SCCM SharePoint Windows 11 Windows Server 2022 WordPress

“I started with Brixton to provide you with daily fresh new ideas about trends. It is a very clean and elegant Wordpress Theme suitable for every blogger. Perfect for sharing your lifestyle.”

© 2022 - Prowdly Powered by Wordpress